
People have asked me about the technology behind the 2.5D billboarded look of our game, so I thought it would be time to write a blogpost about it.

A screenshot from our launch trailer
In the beginning…
It became apparent very early in our 2.5D development that billboarding could quickly become a huge performance cost. We wanted thousands of animated billboards forming mountain ranges, forests and plains of grass. In our very first approaches we tried to use regular sprites with attached monobehaviors updating their rotation. This worked pretty well as long as our camera angle did not change. But as you’ve probably seen in our launch trailer, we wanted to be able to zoom in and out while changing the rotation of our camera.
Enter Cartography…
It was clear we needed to change our approach, and Cartography was born. Cartography is what we ended up calling the system in charge of generating and drawing our landscapes (ground, cliffs, trees, mountains, grass, water, etc). We also implemented Unity’s new Lightweight Rendering Pipeline to get even more performance out of our rendering.
To solve the billboarding problem we turned to shader approximations. We simply move the vertices of our “sprites” in a way that looks very much like they’re being rotated. From a first look this works very good, but we quickly ran into the problem of translating between world space and object space as we wanted the base of our objects to always remain still and attached to the ground. To solve this issue we ended up baking that information into the y-component of the second uv-channel of our billboard “sprites” (or meshes).

A screenshot from our editor drawing the pre-baked y-component of the second uv-channel. Notice how the base of the objects are completely black, and how objects gets brighter and brighter the taller they are. The whiter the part of the object is the more it gets displaced, and blackness indicates the part of the mesh we don’t displace at all.
Baking this information was actually very simple as shown in the method below.
void BillboardFixer(Mesh mesh)
{
    var vertices = mesh.vertices;
    var uvs = new List<Vector3>(mesh.vertexCount);
    for (var i = 0; i < mesh.vertexCount; ++i)
    {
        var uv = vertices[i];
        uvs.Add(uv);
    }
    mesh.SetUVs(1, uvs);
}
With this baked information we then created a sub-graph for calculating the desired vertex position. Besides the baked second uv information we also needed to know the rotation of the camera. This is calculated and passed to our shaders using this simple line of code.
Shader.SetGlobalVector(
  "_Billboard",
  Camera.main.transform.rotation.eulerAngles * (Mathf.PI / 180f)
);

The sub-graph in charge of displacing the vertices to simulate billboarding
This in turn is fed into our shaders like in the very simple example below. Note that we also had to reconstruct our normals in order to get the lighting correct. We opted for a static reconstruction as this turned out to look better than a dynamic one. But this would definitely depend on the use-case.
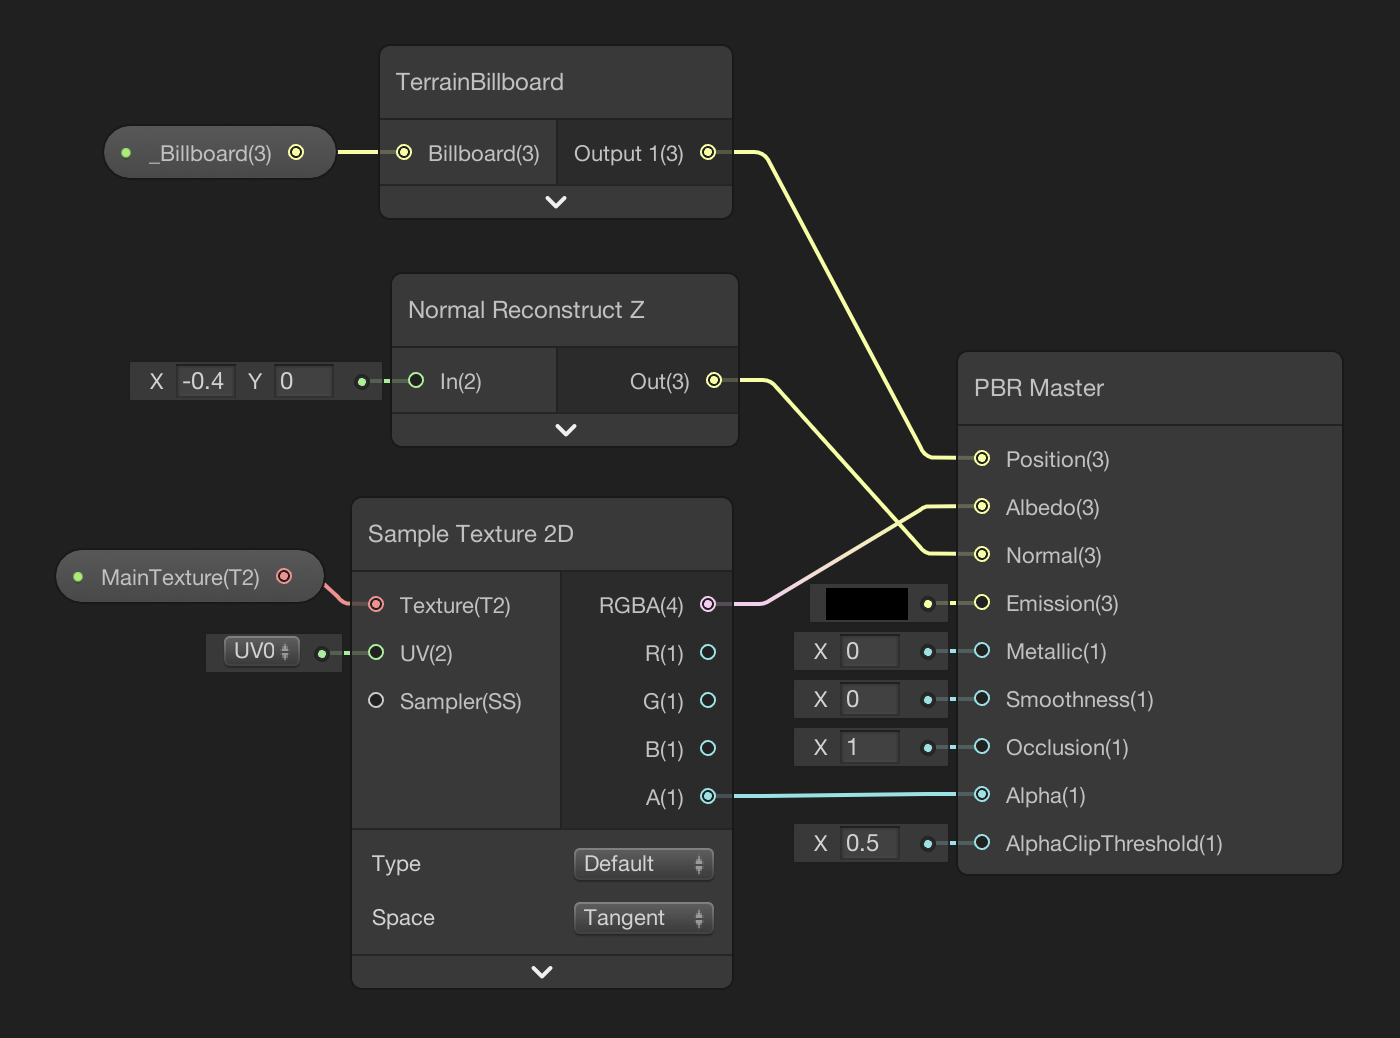
A “final” shader using the billboarding sub-graph
Conclusion
This solution is pretty much tailored to our very specific use case, as billboards only rotate in the X-axis. A limitation that suits our game very well. This approach also batch well, and is generally very fast yet accurate enough for our needs. With that said, I should mention that we've opted for not using this approach when it comes to characters and buildings (anything dynamic really) as any performance gains are quickly outweighed by the complexity of the system.